¶ How to Onboard DevBricks into Azure DevOPs
DevBricks offers seamless integration with your existing Azure DevOps Projects. By following this guide you will be able to enable/disable and customise DevBricks across your desired projects and processes.
- Azure DevOps permissions - The logged in user requires the role of Project Collection Administrator to install the extension, create & configure the Process/subprocess & configure projects
- Supported Processes - DevBricks for Azure DevOps requires a project process to be in the Agile format before it can be enabled. Please ensure the project is set up correctly from the Organisation settings. For more information on how to set up an Agile Project visit here (use same link in point 7)
¶ Step 1: Create your DevBricks account
Head over to DevBricks.ai to create your free account.
Step 2: Link your DevBricks Account within Azure DevOps
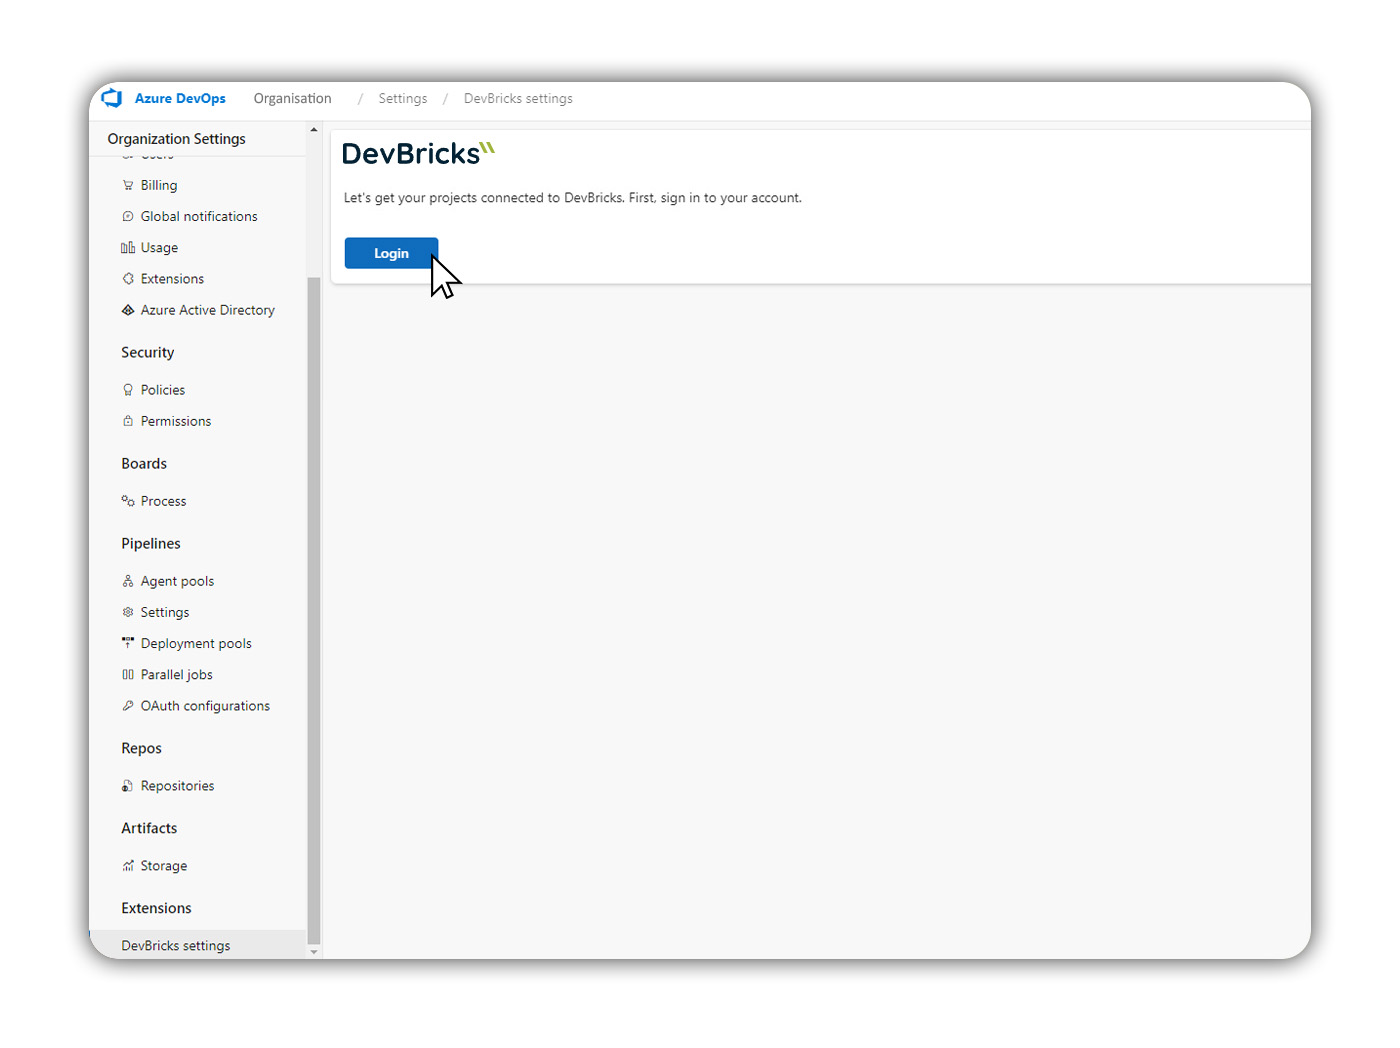
Once DevBricks is installed, head to your Azure DevOps organisation's homepage and access the "Organisation Settings." Scroll down the left-hand navigation bar until you find "Extensions," then select "DevBricks Settings."
Click on "Login" and follow the Microsoft login and validation process to link your DevBricks account with Azure DevOps.
By following these steps, you can seamlessly integrate DevBricks with Azure DevOps.
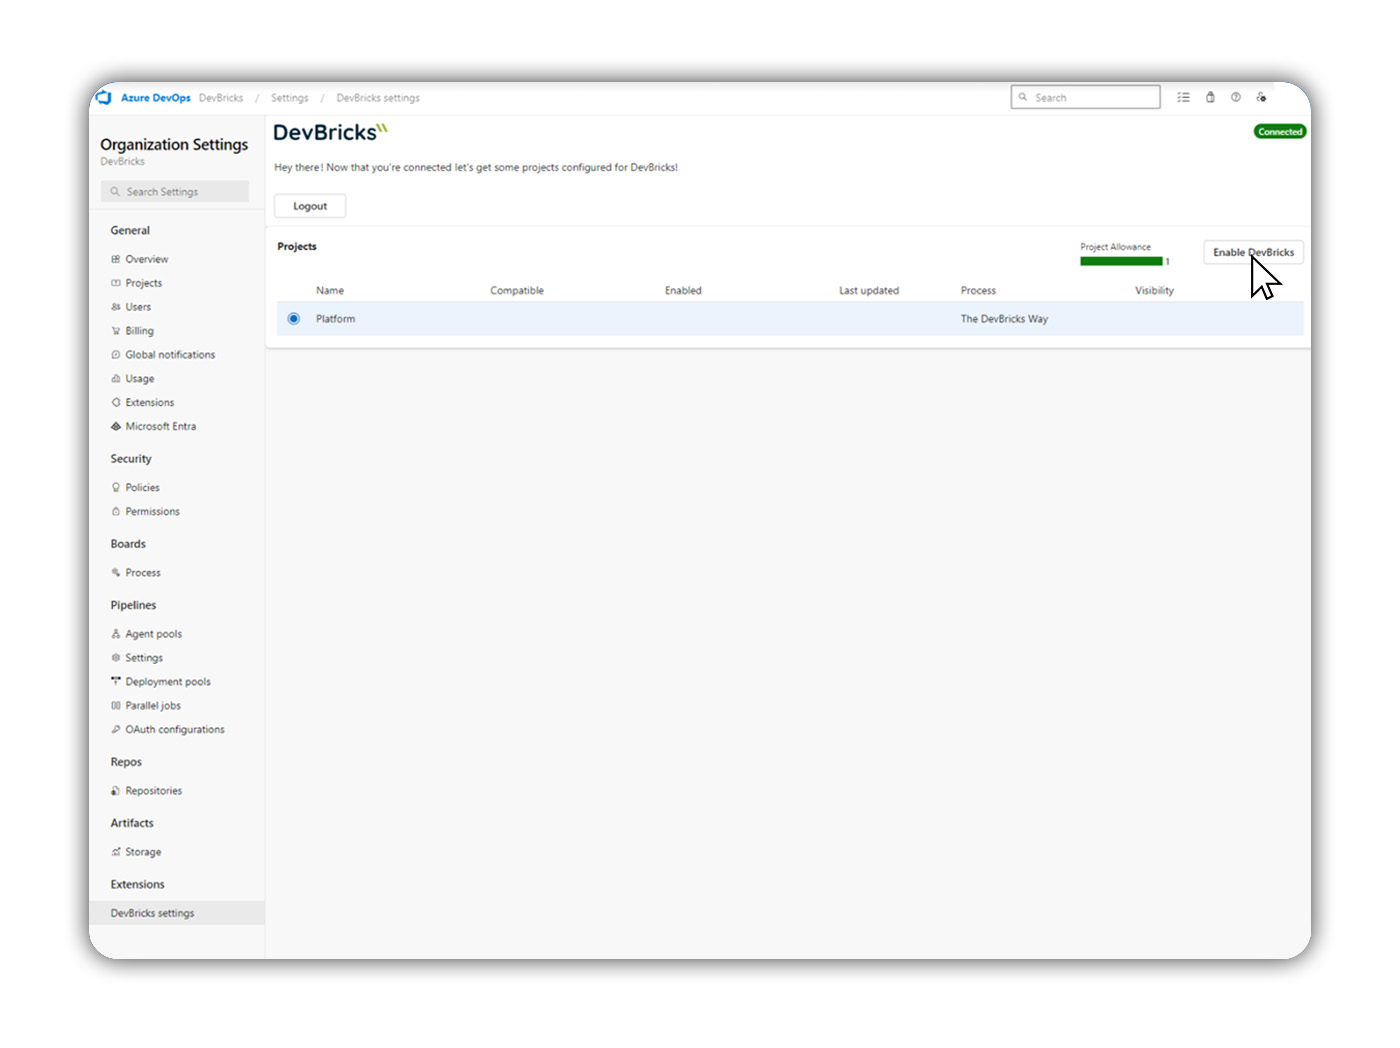
Step 3: Select the project you want to enable DevBricks on.
In the current release of DevBricks, only one Project can be enabled at a time.
If you don’t already have a project and need information on how to create one, click on the link below:
https://learn.microsoft.com/en-us/azure/devops/organizations/projects/create-project?view=azure-devops&tabs=browser
Step 4: Select an existing process or a new process.
Creating an inherited process will be required if you currently have no inherited processes.
While some organisations will not require creating a new process, We recommend creating a duplicate of your existing process while learning DevBricks.
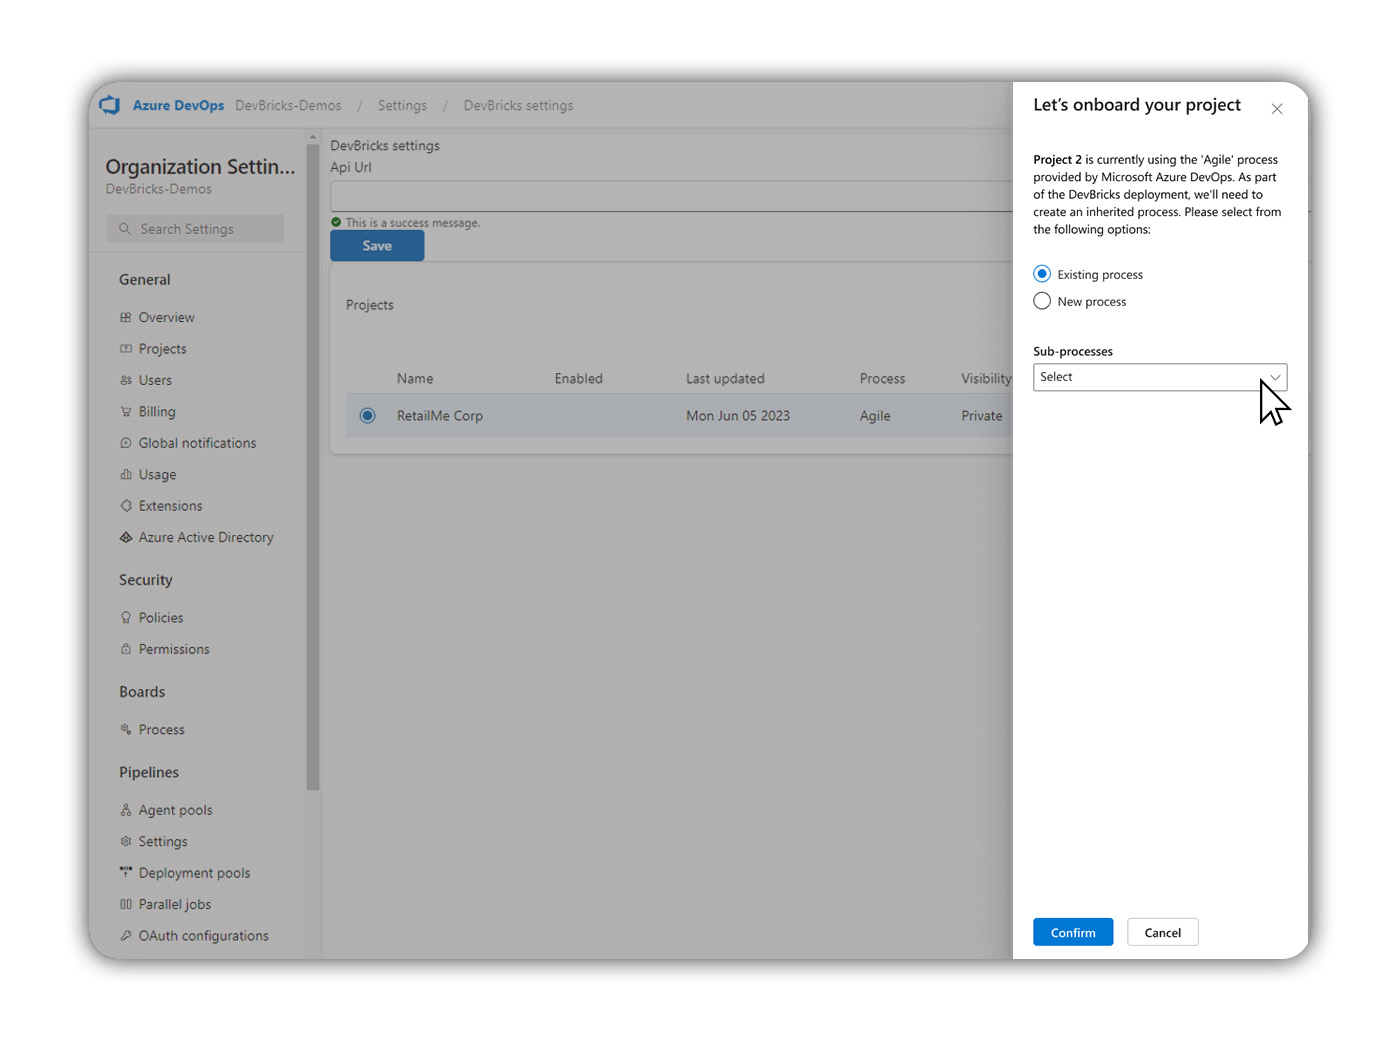
If Selecting “Existing process”:
Select the “Sub-process” you’d like to use from the drop-down menu before hitting ”confirm".
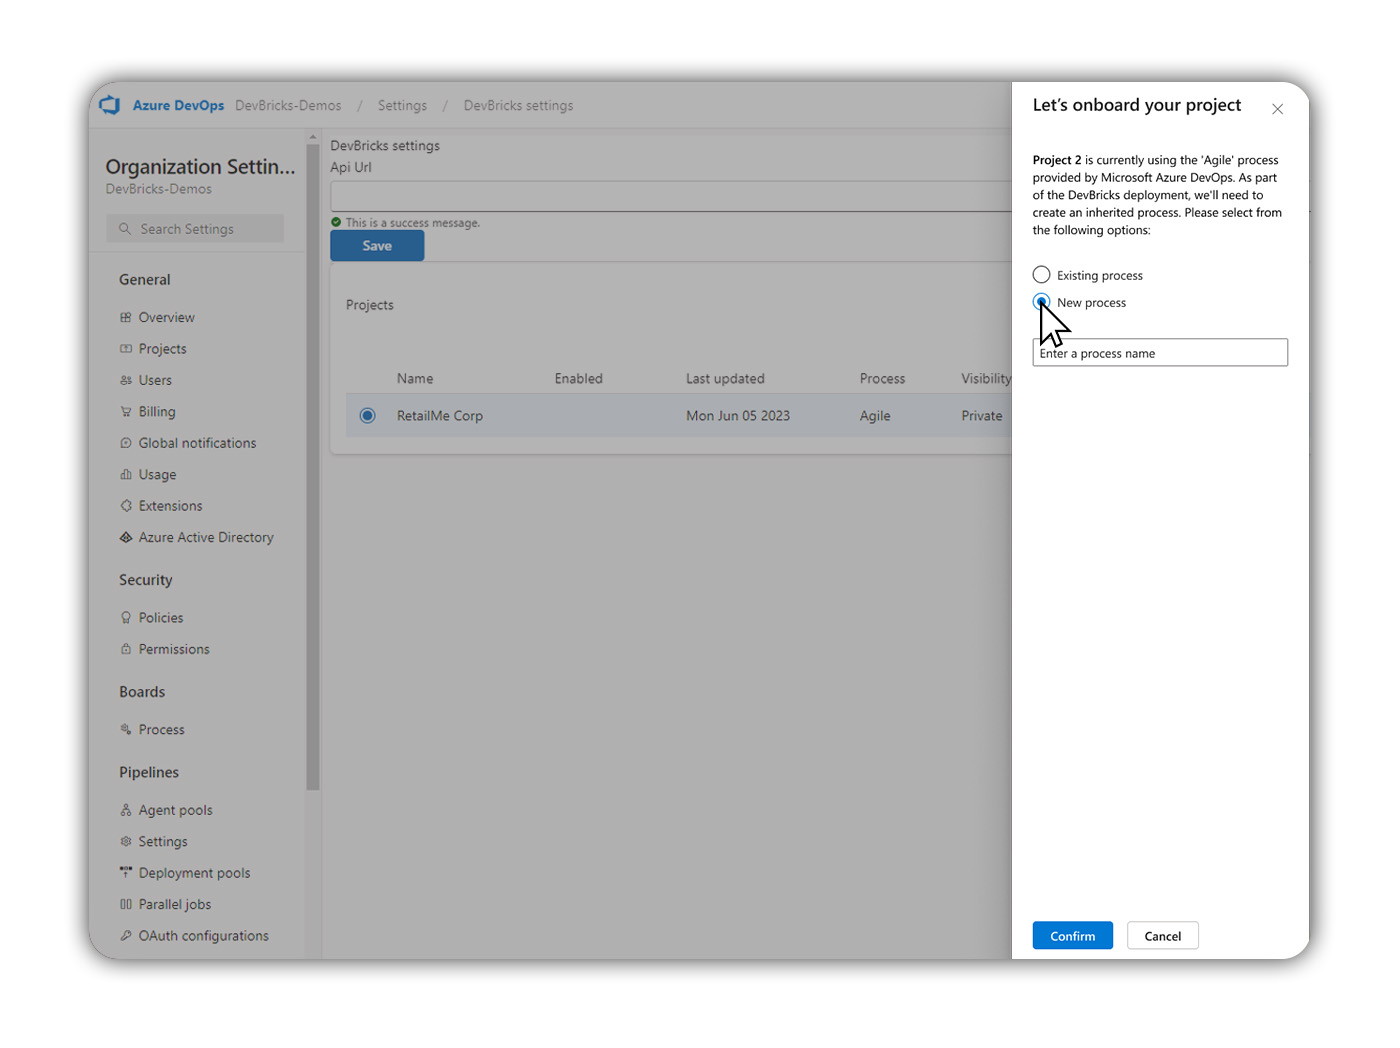
IF Selecting “New Process”:
Enter the name and a description of the process you’d like to use before hitting “confirm”.
If you have a feature you’d like to see included in the future of DevBricks, you can submit a new feature request from your Projects menu.
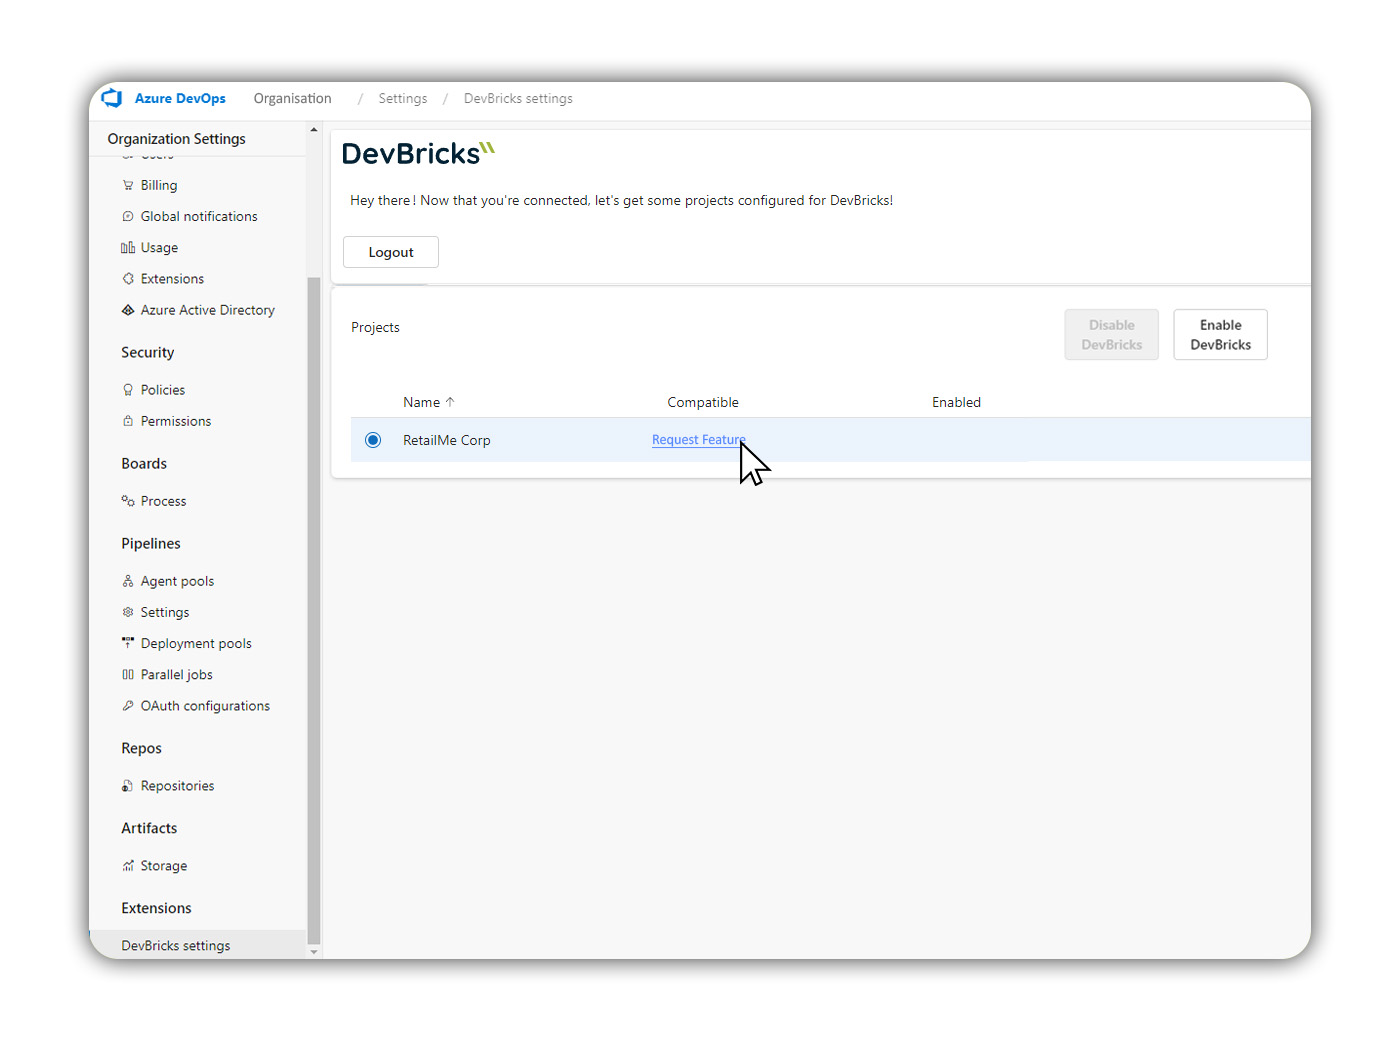
If you’d like more information about how to create a new inherited process you can find it here:
https://learn.microsoft.com/en-us/azure/devops/organizations/settings/work/manage-process?view=azure-devops
Step 5: Access project settings.
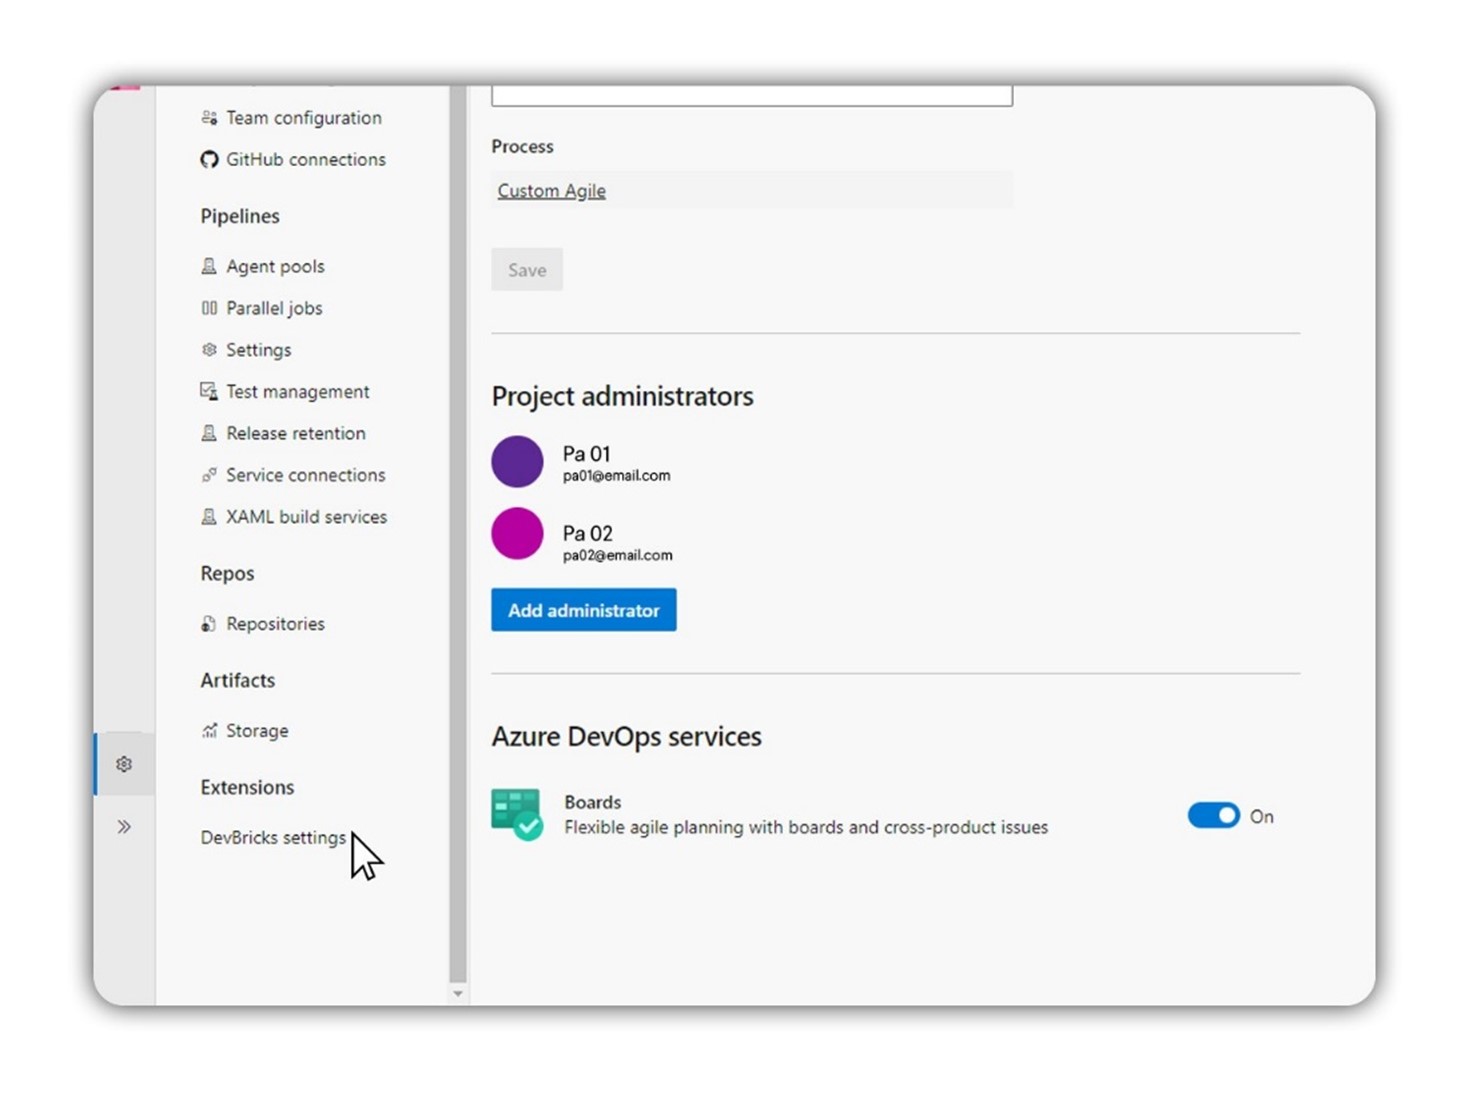
Head out of your organisation setting to your project's homepage and access “Project Settings”. Scroll down the left-hand navigation bar until you find "Extensions," then select "DevBricks Settings."
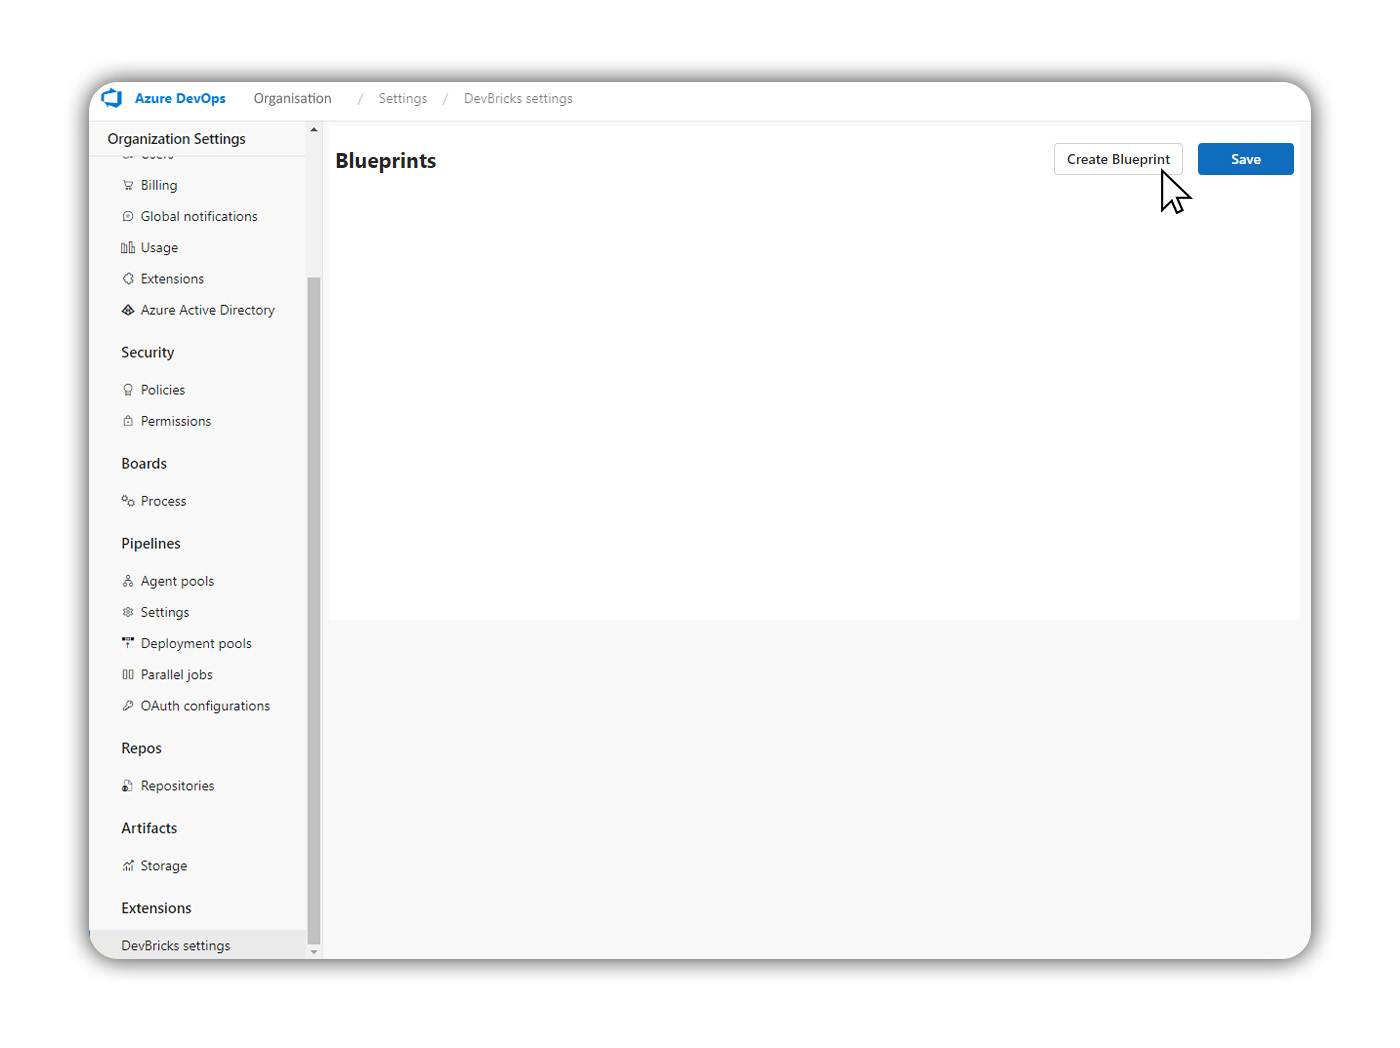
Step 6: Create the Blueprint.
To create a fresh blueprint, select "Create Blueprint."
Step 7: Choose a Brick Pack or Build a Blueprint from Scratch
After choosing to create a blueprint you will be taken to a secondary page to choose how you would like your blueprint to be made.
Select whichever option suits your requirements before selecting “Create” at the bottom of the page.
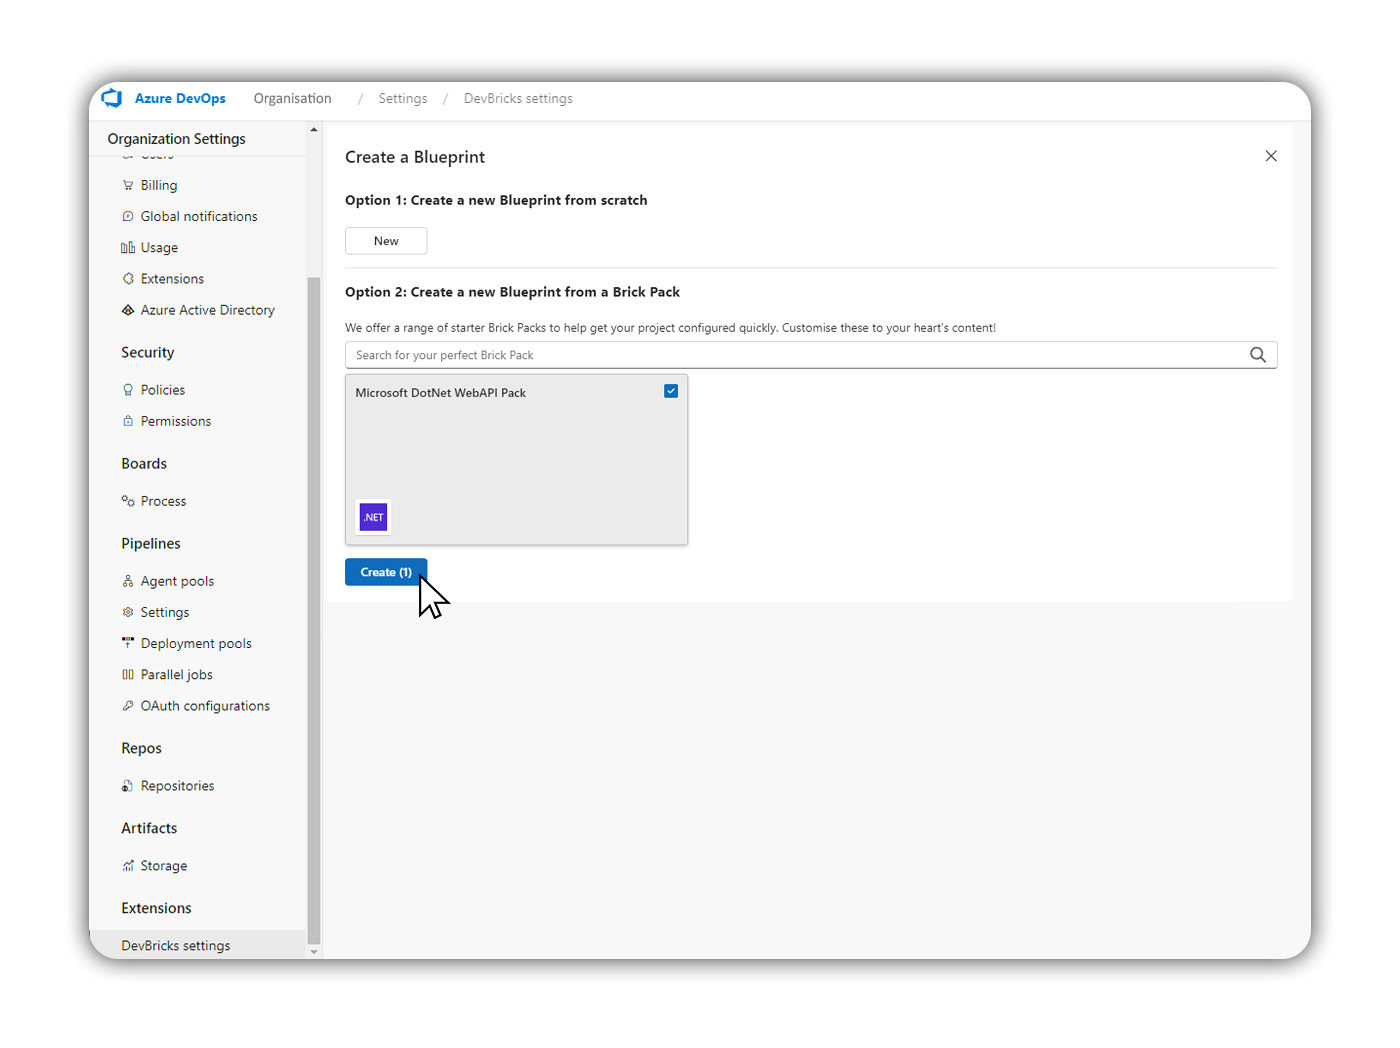
Choosing a Brick Pack:
By choosing to create a blueprint from a Brick Pack, DevBricks will supply a pre-built blueprint. This blueprint will contain all technologies from the chosen brick pack.
Note: We recommend starting with these templates while learning DevBricks to provide a solid starting point for your code generation.
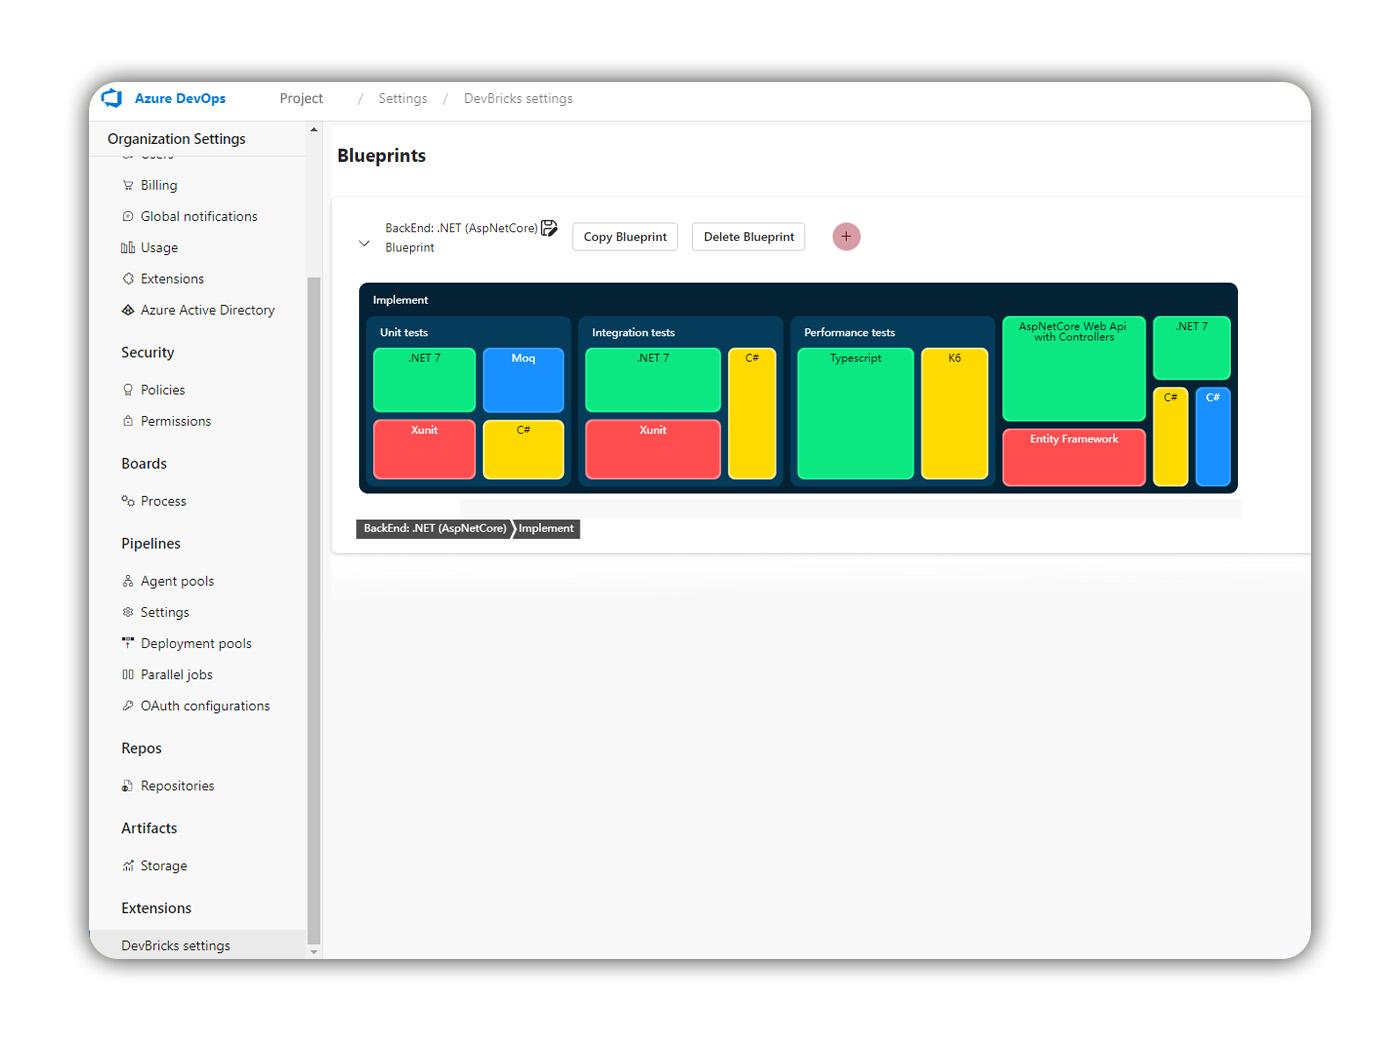
Building a Brick Pack from Scratch:
By choosing to create a blueprint from scratch, DevBricks will supply an empty blueprint for you to build off.
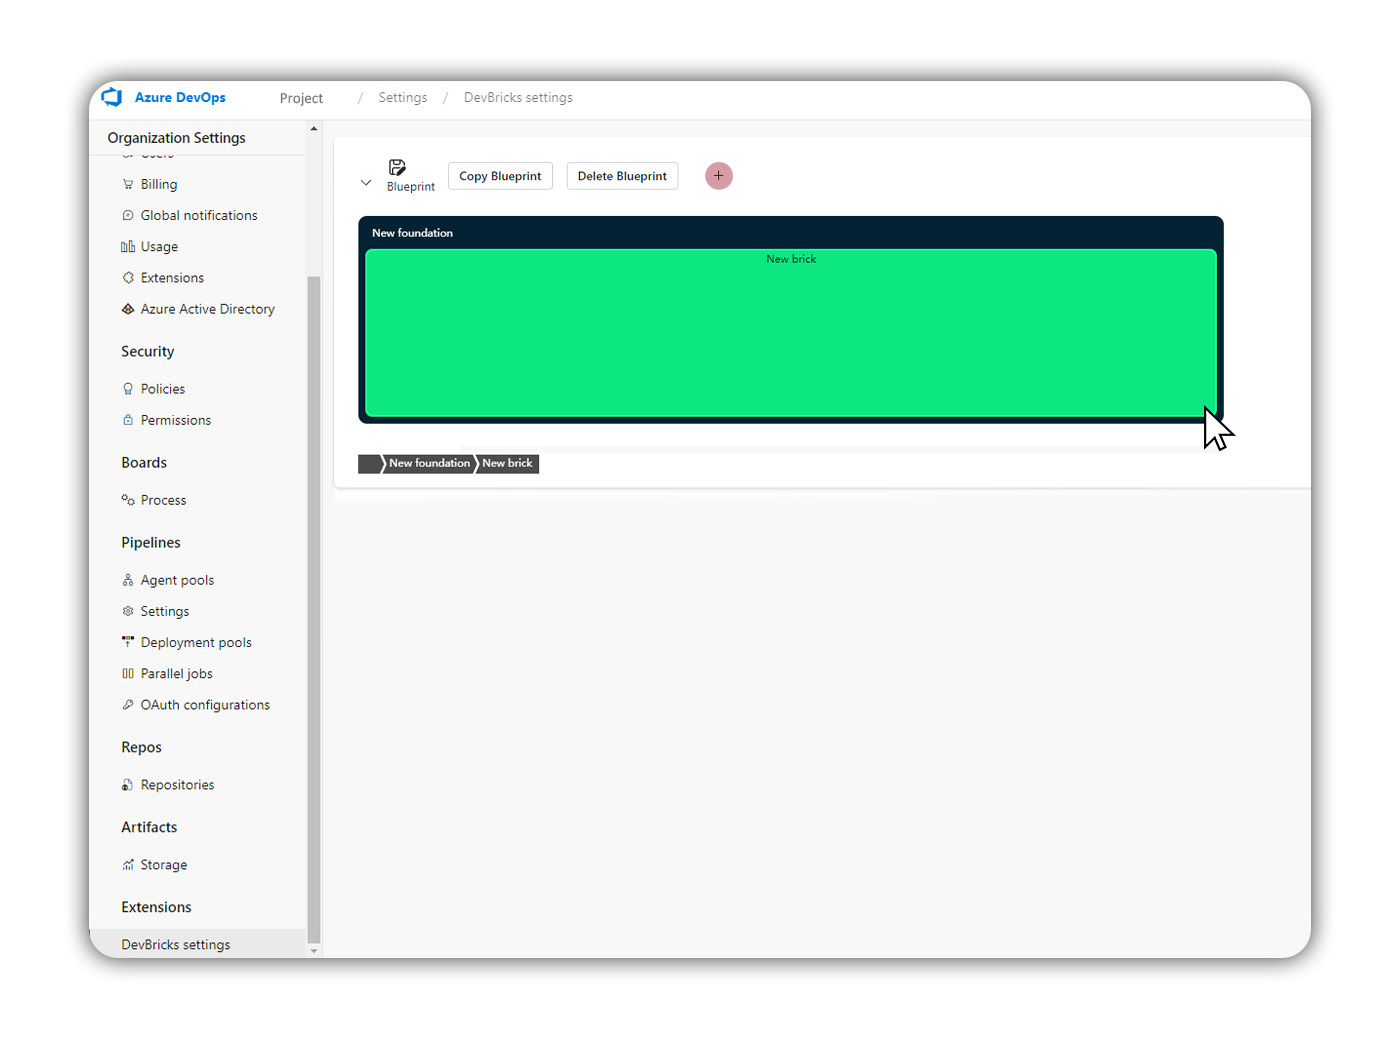
¶ Step 8: Customise your Blueprint
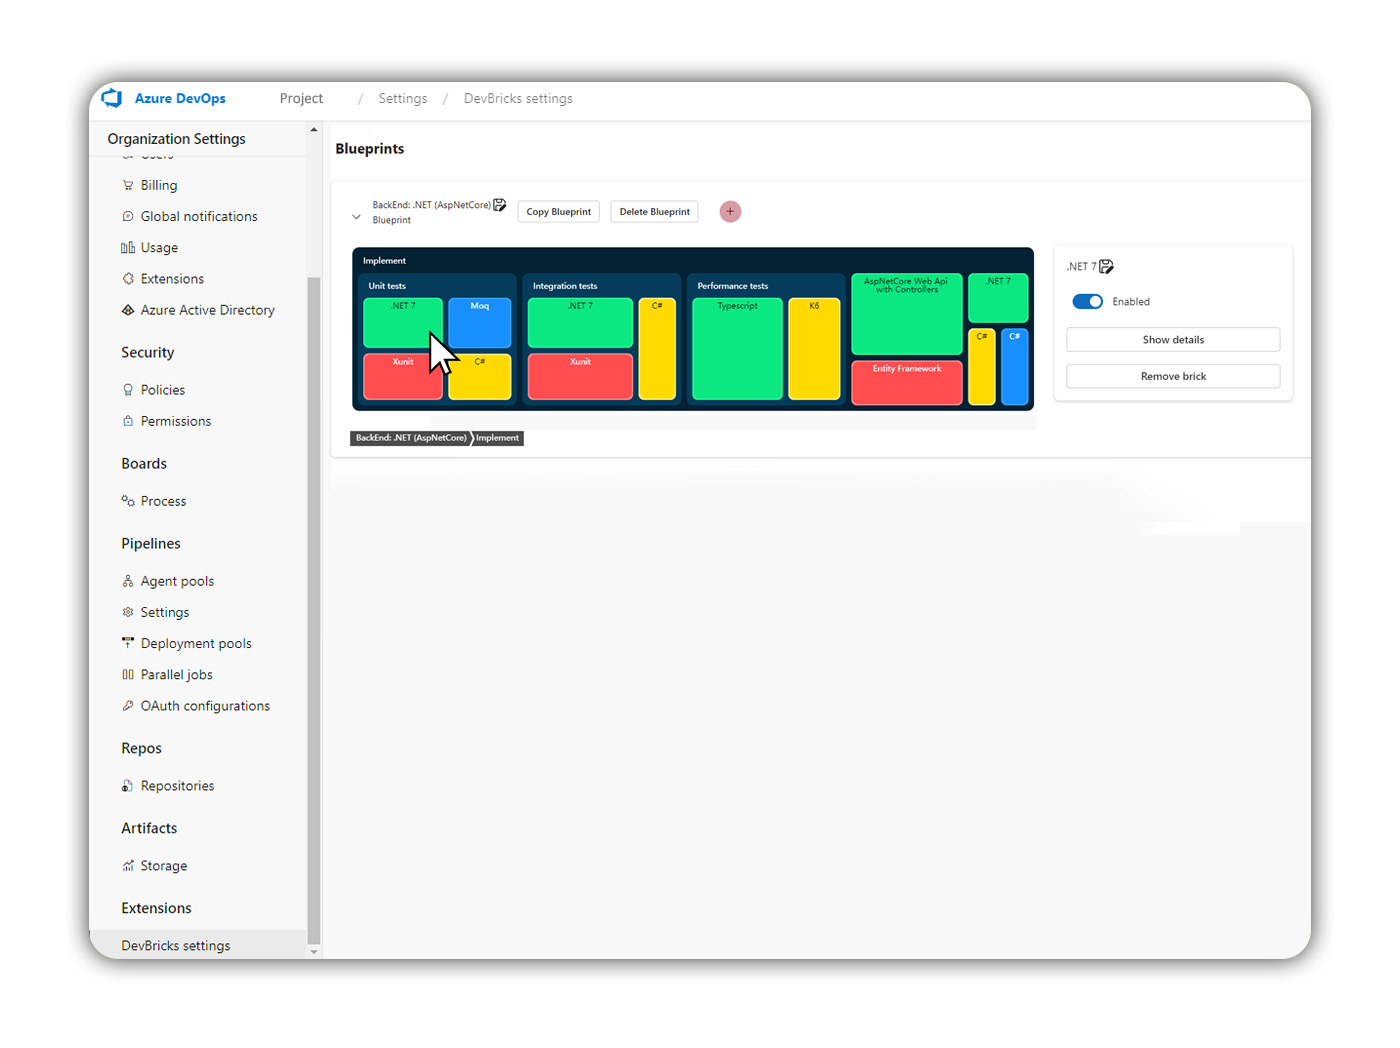
Once a blueprint has been created and assigned to a team, these settings will be used across all user stories within your project. Therefore, it is important to set up your blueprint to meet all your business requirements.
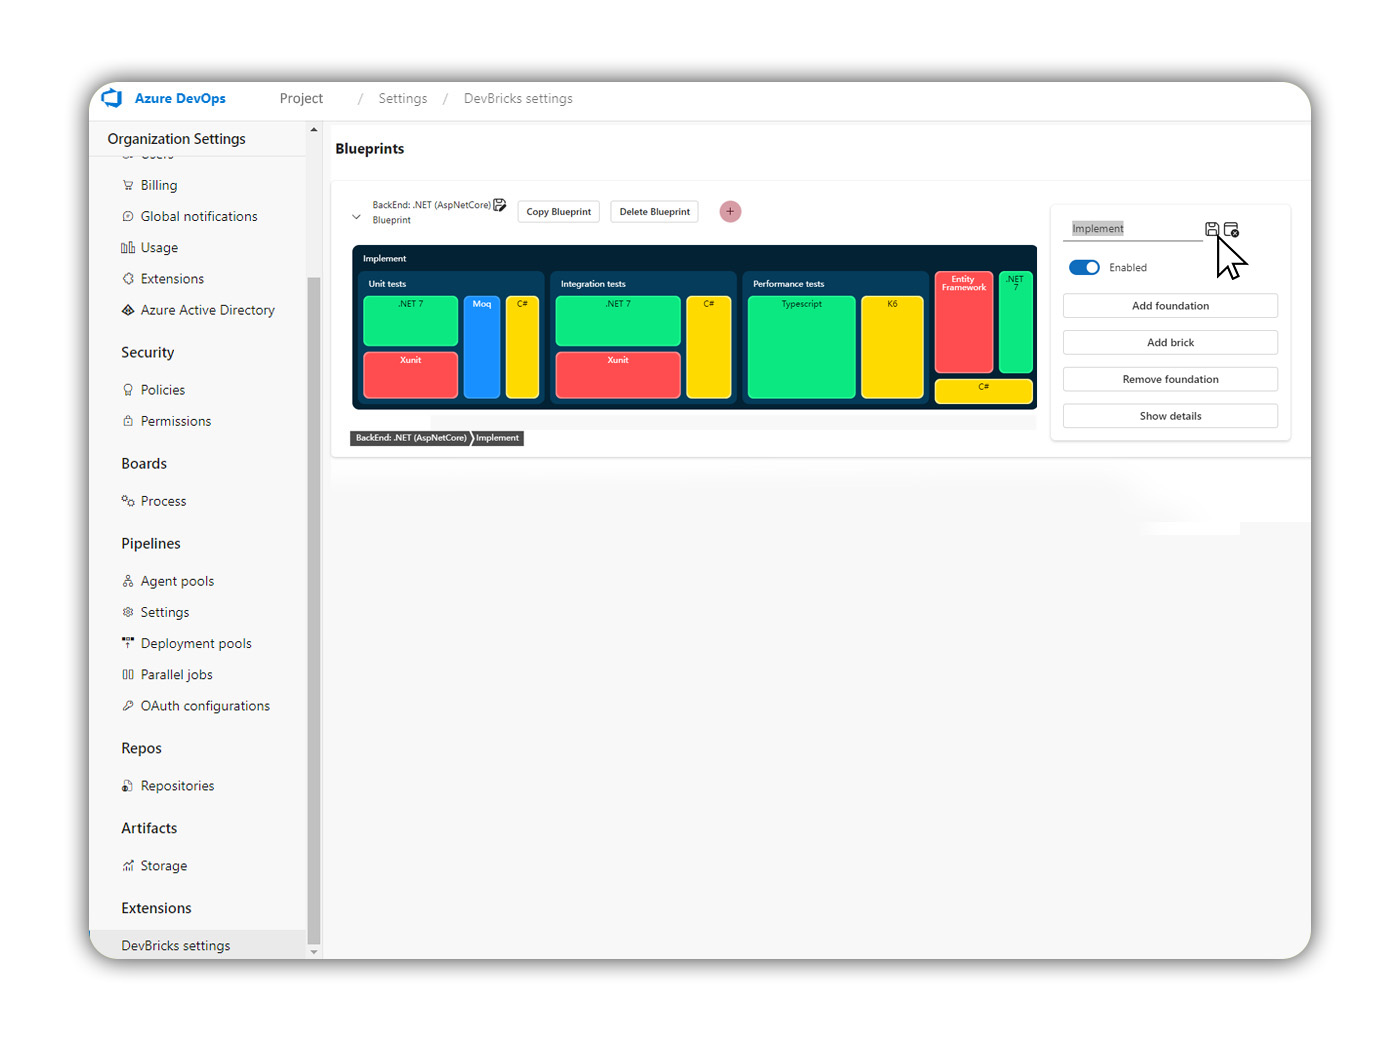
Adding additional foundations:
To add a new foundation area to your blueprint, select the existing "foundation" section you wish to add to and choose "Add foundation." This will create a "New Foundation" area containing a "new brick."
Select the new foundation and click on the floppy disk symbol next to its name when the pop-up menu appears on the right. Open the editing bar and replace "New foundation" with the label you wish to work with (e.g., performance testing).
Adding a new brick:
To add a new DevBrick into a foundation area, simply select the section you wish to add it to and choose "Add Brick." This will create a blank brick titled "New Brick."
Select the new brick and click on the save symbol next to its name when the pop-up menu appears on the right. Open the editing bar and replace "New Brick" with your desired title (e.g., .NET 7).
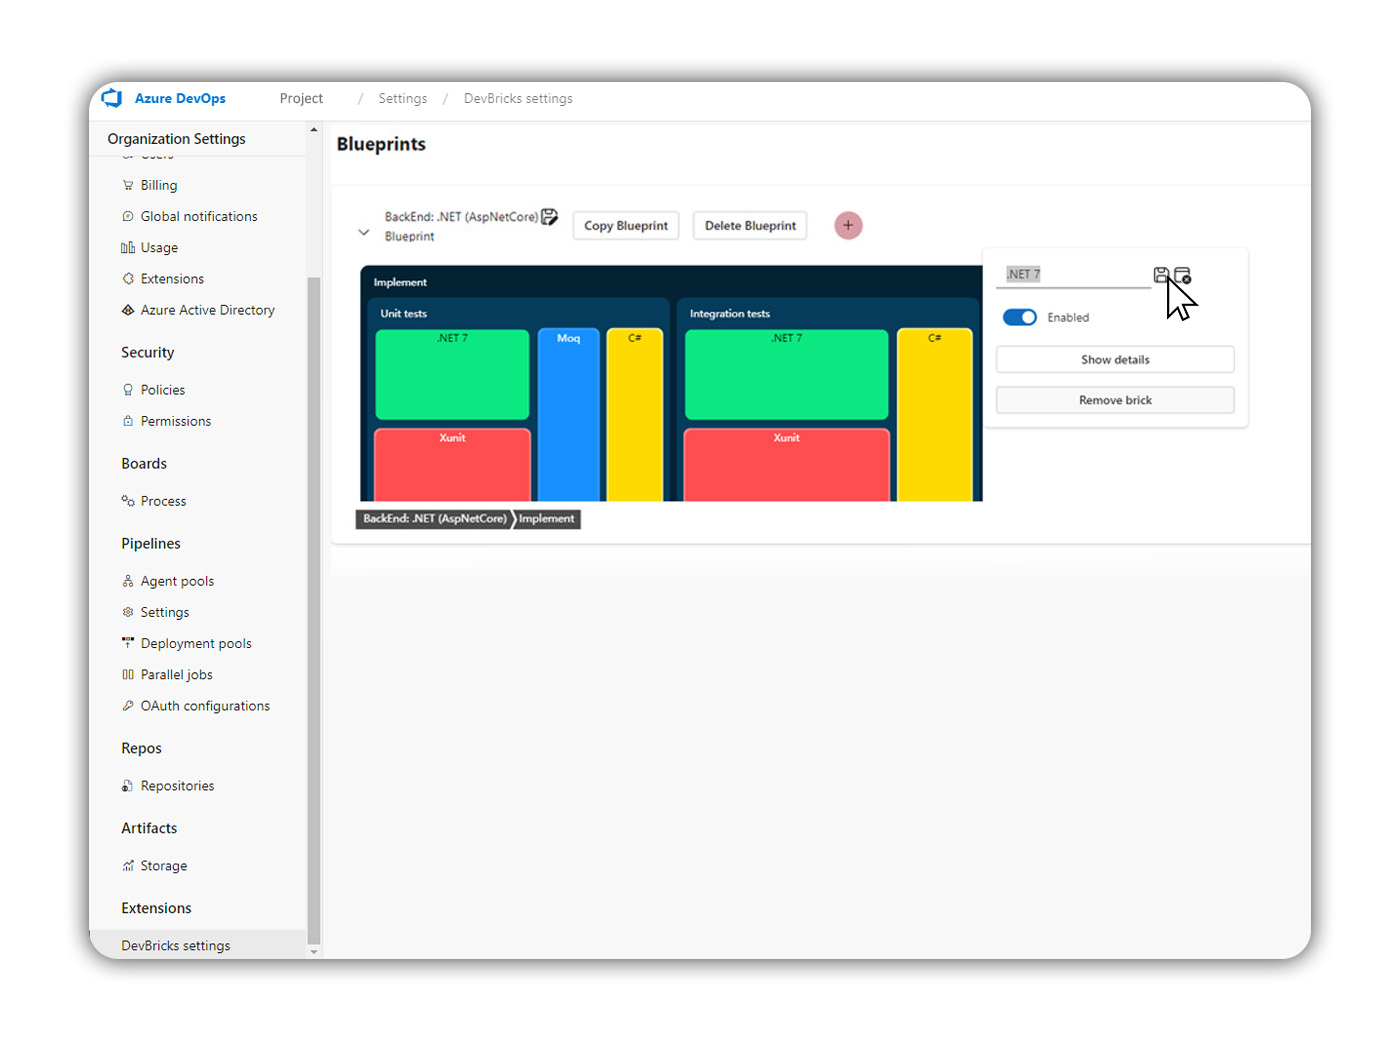
Customising Bricks:
To change the properties and rules of any brick, simply double-click on the chosen brick to bring up its customisation menu. From this menu, you can choose from your choice of brick packs from the marketplace or configure them manually. Once you have finalised customisation, simply select “Save”.
Editing foundations and bricks:
To edit any chosen area of your blueprint, simply select it to bring up its menu. From this menu, you can toggle between enabling and disabling it, viewing its details, or removing it altogether.
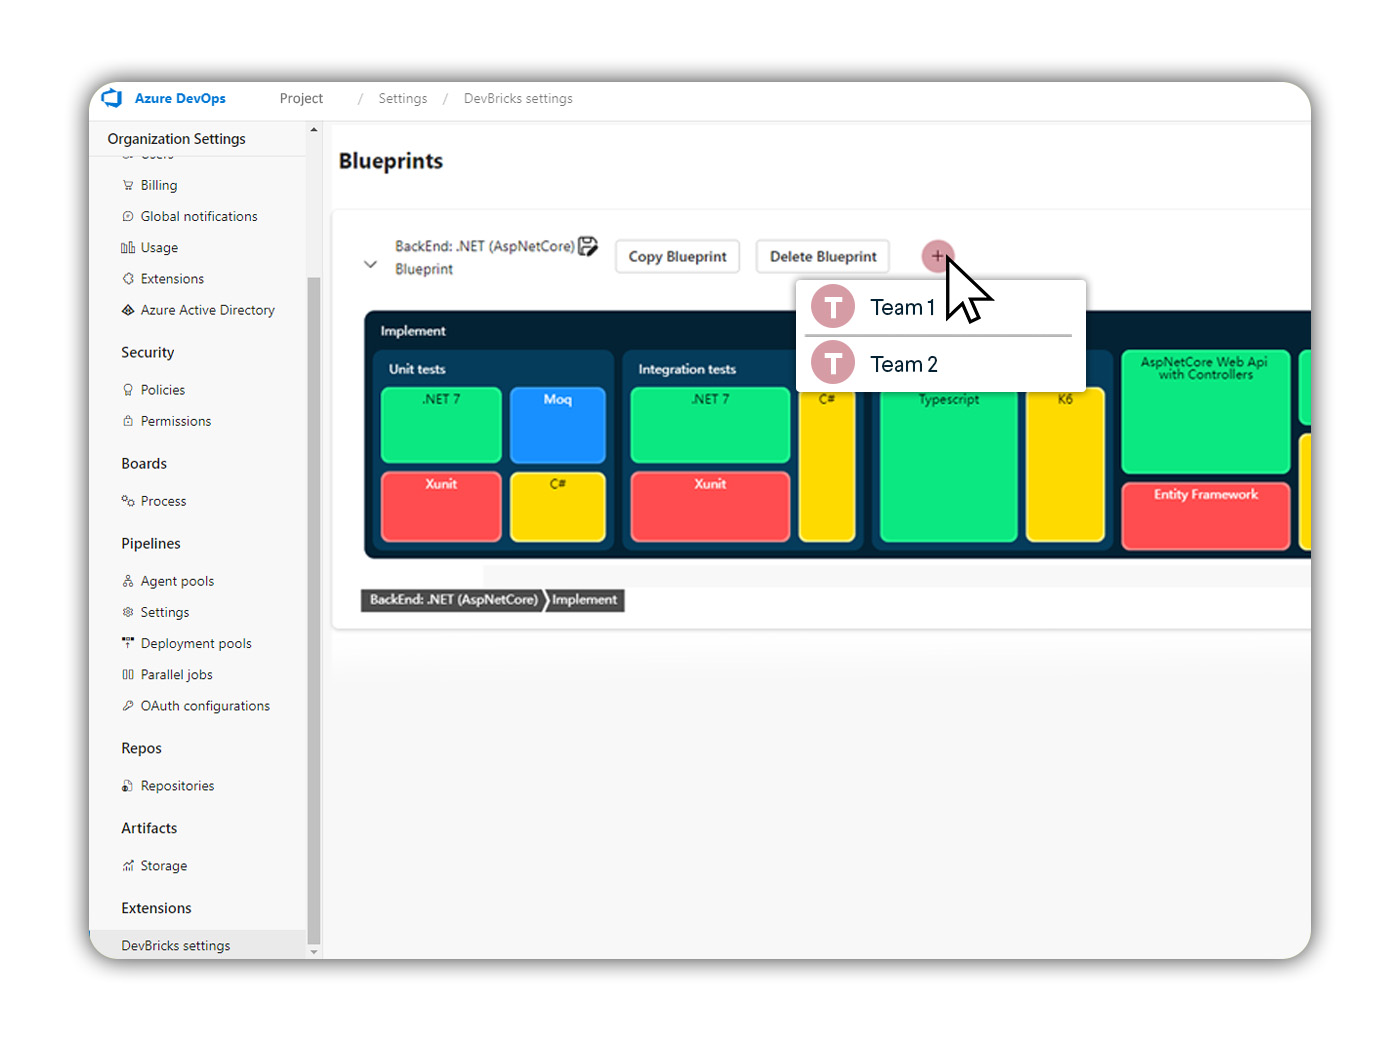
Adding teams to a blueprint:
To assign your blueprint to a chosen team, simply click on the "+" under the team section.
¶ Step 9: Save Blueprint
After chosen Blueprint has been selected hit the “Save” button in the top right corner of the screen.

Note: if the save button is not selected before exiting the window all blueprint creations and customisations will be discarded.
¶ Step 10: You're ready to go
Once completing all of the steps above, DevBricks will be available for use across all user stories within your chosen project.